I have been wanting to make chore charts for a while now. Both my older kids are old enough to start helping out, and I was looking for something that would make it a little more fun for them than just me telling them to do something. We all know how well that works with a 4 and 2 year old anyway, right?
These charts were fairly simple, yet very kid friendly. Which I guess is pretty important, since the charts are for, well, the kids. They look at their charts in the morning, see what jobs are in their "AM" line and try to get those done before lunchtime. They see the jobs in the "PM" line and know that those jobs need done before dinnertime. When they complete a chore they turn it over to see two stars on the back. Star side up means that job is completed for the day. The "Extra" line is for extra jobs they can complete in order to earn a fuzzy pom. Once they earn a pom they put it in a glass jar we have sitting up on the shelf. Once that jar is full we will take a trip to the dollar store where they can each pick anything out that they want.
THE SUPPLIES:
Posterboard
Velcro tabs
sharpie markers
contact paper
scissors
star stickers
I only used half the poster board to make two charts. First I cut it in half, then cut one of the halves in two.
I love these printouts from Homeschool Creations! I love the broad range of jobs on them and how easy they are to read for little ones. I also love that they have both boy and girl pictures. Use scissors or a straight edge cutter to cut out the little squares.
Cut out a piece of contact paper large enough to fit several squares onto it.
Then cut out another piece exactly like it to fit on top. Smooth it down from one end to the other, being careful to smooth out any air bubbles as you go.
Once you've covered the squares go back and use your fingernail to make sure there's no air along the sides of the pictures.
Now you are ready to cut them apart!
Cute little laminated chores.
Use the laminated squares as patterns to figure out where you want them to be, and use a straight edge to mark them.
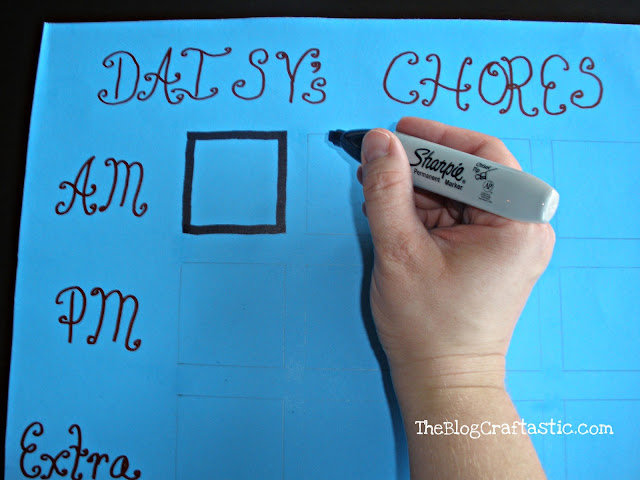
Write out the title and "AM", "PM" and "EXTRAS", or whatever you want to label it, and then place them on the chart where you would like them to be. It helps to visualize how big the letters should be and where they should be placed on the chart before you start drawing them on with a permanent marker.
Once you have it sketched out you can then go back with a permanent marker and draw your lines. I think this might have been the most fun for me. I love Sharpies.
Now that our squares are complete we just have to finish with the velcro!
When I went looking for my velcro I could not find the little circles. I found these ovals, which work fine, I just really liked the look of circles better. But they do the same job. Put a fuzzy side velcro piece on each square.
Like so.
Then put the other "teeth" side of the velcro on the back of each chore.
Next we need to put part of another "teeth" side on the front of the chore squares, so that they can be turned over when the chore is completed. Here is another reason why I wanted the little circle velcro. I had to cut them up for this part so they didn't cover the whole picture.
Now put a star sticker on the back of each chore.
I got a little sticker happy. Once I had put a star on all the squares I decided I liked it so much that I needed to put another star on each one.
And there we go! Now the fun part!
Getting the kids to do it!
We have only started doing this, but I think it's working well so far. My girl seemed to be more conscious of being nice to her brother so that she could get a pom for the "no fighting" chore in her extras box. Now if it will only last! Here's to hoping!


No comments:
Post a Comment