
The Project of the Month this month is a no sew blanket with a twist! I don't think I've ever put up a tutorial on a fleece blanket. This is surprising since I have made a lot. I mean, a lot. Now that the air is getting a little cooler I will hopefully be making more to go up in my etsy shop and maybe I will do a tutorial of one too.
Here are some I've done:
No sew fleece blankets. So cute, so cuddly, so professional looking, and so EASY!
These are the standard no sews. Print fleece on the front, solid color on the back. Simple.
I recently had a request for a fleece blanket. When I asked the colors, I was told gray and white chevron, yellow, and muted green. Three colors. I started brainstorming. I didn't want to put two print sides together. It just looks so much better when one side is print and one is solid, but how was I going to do two solid colors?

Introducing the tri-color fleece blanket. And yes, it is still a no-sew! It takes just a couple extra steps than the no sew blanket with two colors. Here's how:

What you need:
1 yard print fleece fabric
2 coordinating solid colors, 1 yard each.
Fabric shears

Fabric is never cut to exact measurements, so the first thing you want to do is line up your print fabric with your main solid color fabric. Lay down first the larger piece. In my case it was NOT the print, so I ended up having to flip it once I had it laid down. Not a big deal, just easier if you don't have to do that. Lay it larger side down.

Try to smooth out all the wrinkles so it is lying flat. This is a VERY forgiving project. Meaning, nothing has to be exact because once it is all done, you can't see any mistakes! Love that.

Cut off all the excess so that the fabric pieces are the same size. If you were just doing one print and one solid color, this is where you would be ready to cut your strips all the way around. These next few steps are what make this fleece blanket extra special! A third color to give it a little extra pop!

If your fabric does not have a straight edge, you will need to give it one. The easiest way I've found to do that is simply to lay the fabric down on top of my already cut edge of the other fabric piece, and follow it as I cut. You are going to cut a long strip the whole length of the blanket and up the sides about 6 inches or so.

This is how I cut a straight line. I just cut my straight edge by lining it up with the chevron, so now to cut another straight edge I fold the green up to where I want to cut. I like my strips to be about 3 to 3 1/2 inches, so I made the strip about double that.

Cut the whole length of the fabric.

Now you should have a strip like this. Remember what I said about a forgiving project? It won't even matter that my strip is crazy crooked! Lay your strip down on the same color and cut out a second strip the same size.

Next you want to do the same exact thing on the ends.

Once you have one end strip, lay it down on the same fabric and cut out a second one the same size.

So now we have our print and one solid color lying together, and we have 2 side strips and 2 end strips of the second solid color. Now we want to insert the strips into the blanket. Lift up the top print wide enough to fit in your strip.

Lay down the strip, lining it up with the bottom edge and sides.

Fold the print side flap back down, covering the strip.

You will have to cut two of the strips so that they don't overlap.

Once you have all four strips nicely tucked up under the top layer of fleece, it's time to cut strips! I like my strips to be about 3 to 3.5 inches long. I start in the middle of one side and make my first cut.

Cut an identical, parallel line about 1.5 inches over. You have your first strip! Continue cutting these all the way to the corner.

If you cut your strips wide enough, you shouldn't have any trouble but still be aware of where you are cutting. You don't want to cut that middle piece of fabric all the way to the top!

I cut until I am about 4 to 6 inches from the corner, then I stop.

I then go back to the middle where I started, and start cutting more strips the other way, towards the opposite corner.

Once I get 4 to 6 inches or so from that corner, I stop again. Continue to do this on all four sides of the blanket.

Oh! One thing I forgot to mention. Keep in mind that your strip under the top layer has a cut where the side and the end strips meet. When you are cutting towards it, make your strips line up so that the slit between strips is the edge of a "tab". Once you've cut all the way to the corner, go ahead and just cut that corner off.


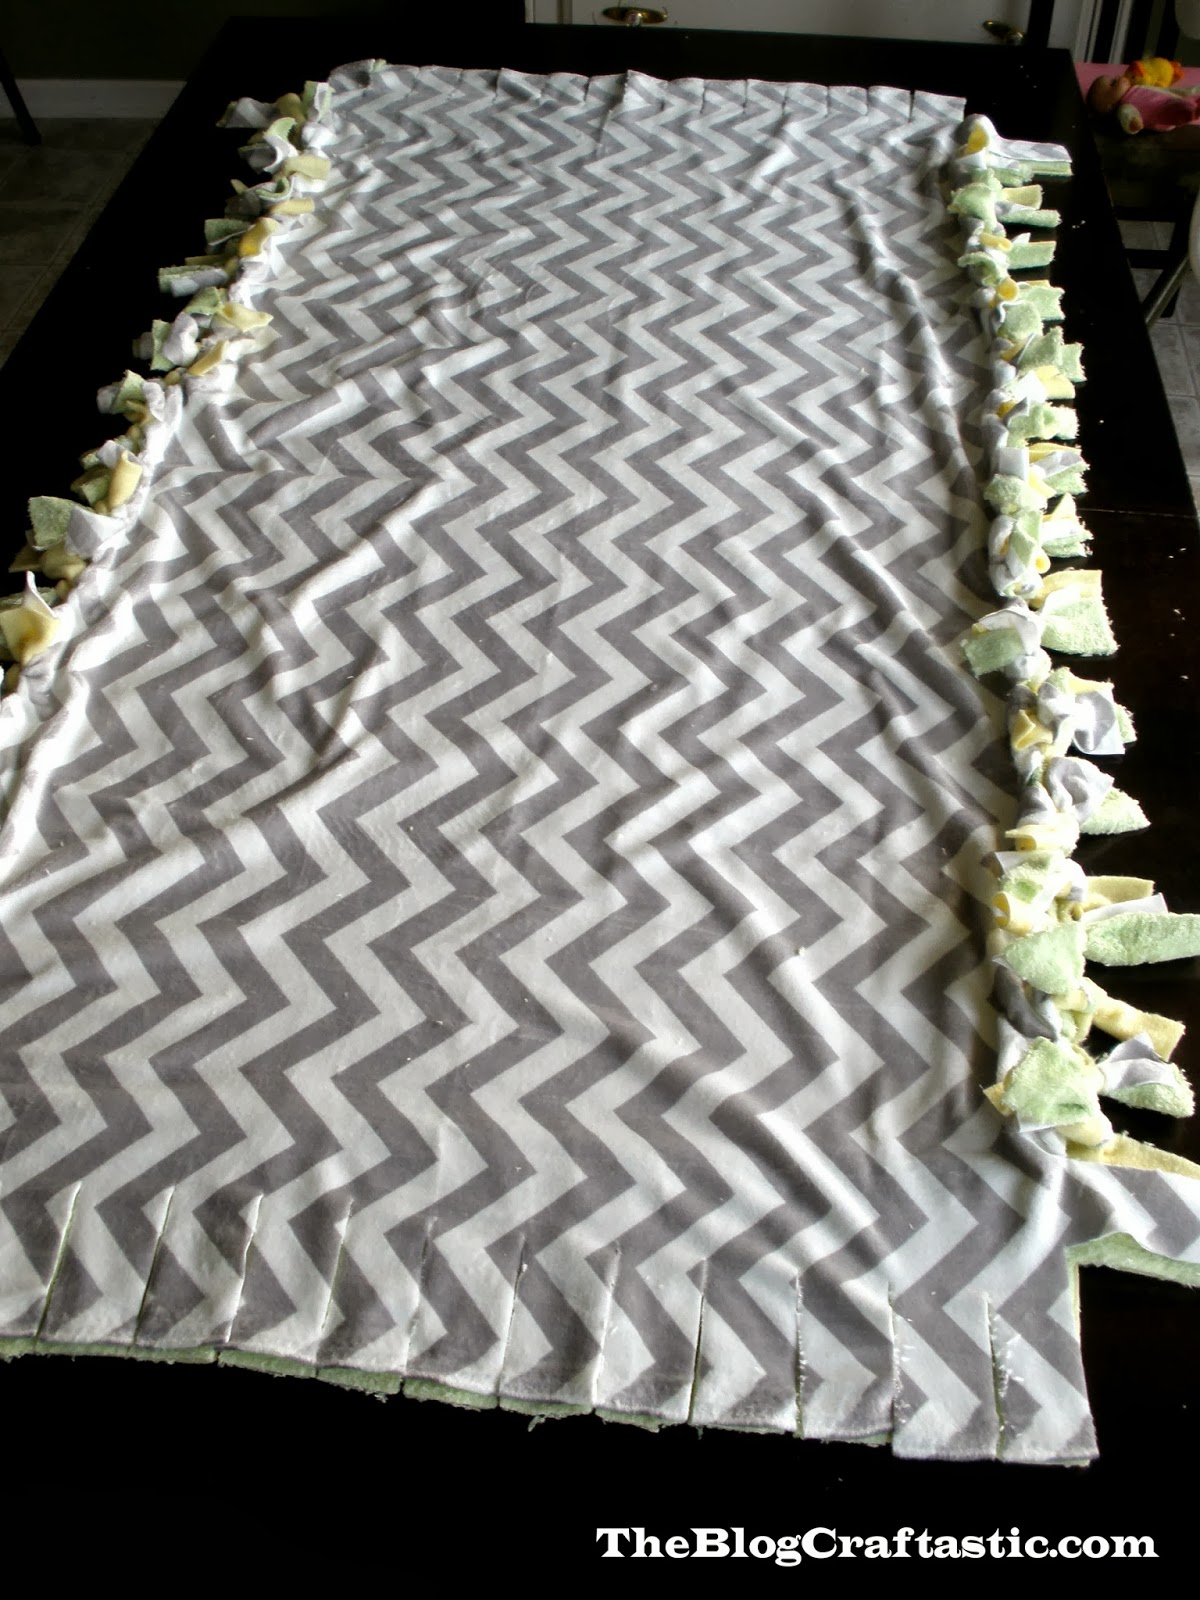
This is what the blanket should look like when you are done cutting all the strips and corners.

Now to start tying! My yellow fleece seemed to be a bit thick, and the chevron and green were a bit thinner. So when tying I held the chevron and green together and pretended it was one piece and then I just tied a double knot with the yellow piece!

Like so...

Keep tying each strip together. I use the same method of starting in the middle of a side and work my way to the corners. This helps to be able to stretch the fabric and work out wrinkles along the way.

Tie all the way to the corner, then stop with one strip to go.

Repeat on all four sides.
Now that I have the sides done I will do the ends.

Corners can be a little tricky if you let them. The secret is to keep stretching the fabric as you tie. Don't worry too much about tearing it a little bit. Fleece won't fray.

This is what the corner looks like right after you tie it and just before stretching it out.

Here it is after being stretched.

And we're done!


Check out the two colors! Fits quite perfectly with the chevron, I think.

I've already started doing this technique on a new blanket. I have yet to decide if I want to put it in the shop or keep it. It's pretty cute.

Now go make one of your own! And please share! I would love to see them!
Amazing Article
ReplyDelete