Showing posts with label kids. Show all posts

27 May 2014

Backpacking To The Library


Since being down to one car, I miss being able to just up and go somewhere with the kids during the day since the Hubs has the car at work.  Today we didn't let it stop us!  Trip to the library!  

One thing is for sure, I was prepared.  I can't believe I forgot to take a picture of the boys in the bike trailer/stroller.  Ice water, bag of books to return, diaper bag with essentials of diapers, wipes, and a change of clothes for the potty training dude.  Daisy rode her scooter, I jogged while pushing the stroller.  It really wasn't that far - just over a mile - but quite a hike for little ones.  One the way back, Daisy wanted to ride so her and Jesse switched out.  We hung the scooter over the stroller and Jesse jogged beside me.  When he got tired about 1/4 of the way from home, I put him on my shoulders and pushed the stroller.  If only the paparazzi had come along just then.  They're always just missing me, it seems.

Daisy was such a trooper!  We walked into the library, hot, sweaty, and red as beets.  I'm sure we were a sight.  People just smiled.  We freshened up in the bathroom and fully enjoyed our library play time. 

Our library has an awesome kids section.  Not only great books but also toddler appropriate computer games as well as oodles of learning toys.  My kids could stay busy there for several hours.  Unfortunately we only had about 30 minutes before we had to head back so we could get lunch and get into nap time.

Okay, let me just be a proud Momma and brag for a minute.  Jesse is currently potty training and has been doing so good.  Today was his first time "out" without a pull up.  Completely dry the whole time.  AND he jogged almost the whole way back home.  He just might be my athlete.  

Now nap time!  Kid tip #354: If you want kids to take a good nap, drag them around town for a couple miles in the hot sun.  Works every time.

07 April 2014

Crafting with Kids: Potato Cow


My daughter loves to make things.  If she can see it in her head, she will attempt to make it.  Thats why, when I was at a consignment sale this past weekend and found this book, the question was not whether or not to buy it, but whether or not to give it to her now, or wait until her birthday next weekend.  I mean, the title of the book is Make It Yourself, which really could be her middle name.  I couldn't resist.  I knew she would love it and we are done buying for her birthday, so I went ahead and gave it to her.  She goes to sleep looking at it, and she wakes up asking me if we can do one of the crafts in it that day.  

We finally did our first one today: make a cow out of two potatoes.  


Materials Used:
1. White and black or brown craft paint
2. Two paint cups
3. paintbrush
4. One large potato and one small potato
5. Toothpicks
6. String/Yarn
7. Scissors
8. Pipe cleaners

We also did a video tutorial, and she was such a little natural in it, that I just completely forgot to take pictures.  However, it's pretty self explanatory enough, and I did take a picture of the pages out of the book after all was said and done.


I will update this post with the video link when I have it.  I think it was a success!  She's already talking about how she's going to add to the herd with more potato cows.  


02 April 2014

DIY Carseat Recover


This project has been on my to do list for almost a year.  I am crazy excited that I've finally done it!  It was definitely a challenge.  It wasn't really that hard of a project, but what made it difficult was the bulkiness and thickness of it once it was close to being back together.

Here's how it all went down...


I took the cover off and studied it.  I also took lots of pictures as I needed to be able to put it back together once it was all ripped apart!


My plan going in was to rip it apart, piece by piece, discard the old, pink fabric and sew the new fabric onto the padding.  Upon studying the cover, it seemed most feasible to start with the brown fabric that went all the way around and actually folds over the seat with elastic to keep it on.  You can barely see a sliver of brown on the outsides of the seat in the above photo.  There is dark brown bias tape that is sewn across the front on the bottom, then it connects to the elastic with the brown from there and wraps all the way around and down to the other side.  I noticed that this piece was still in pretty good shape, that it matched my new fabric, and would save me a ton of time if I kept it intact and didn't replace it.  So that's what I did!  Then once I took that piece off I decided to work my way to the center in taking it apart.


Here is a picture after the stretch material with elastic was taken off.  Look at the color difference!  I think this seat was more than ready for a face lift!  At this point I also realized that this cover didn't actually have fabric to remove from the padding.  The padding was printed!  I was happy to realize this because this meant I would save even more time.  Instead of ripping the old fabric off the padding, I would be sewing the new fabric directly onto it.

Saving time is always a plus, especially if you happened to have lost your seam ripper over a year ago and somehow completely forget to buy a new one every single time you're in the store.  Seriously.  Every time.  So what I do, without a ripper, is just pull the material apart at the seam until it stops, then use my big scissors to clip the next couple threads, pull it apart again, and so on.  


Once I had all the pieces ripped apart I laid them out on the new fabric as a pattern.  


Used some pins to make sure they didn't move around while I was cutting.  On a side note, if working while your 20 month old is awake and toddling around, do not leave the pins on the edge of the table thinking that they are close enough to you to rescue if he gets it in his mind to investigate.  Because he will.  And his chubby little fingers will move faster than you thought possible, resulting in finding yourself two minutes later, on your hands and knees, picking up every. single. one. off the floor.  


Once I had them all stuck, I cut them out.  


I started getting excited with this step, seeing the new fabric on the shapes.  I love new fabric.


Now we're getting somewhere!  The next step I did was to sew a zigzag stitch all around the pieces, just so it wouldn't slip out of place as I was sewing the pieces back together.  I liked not having to worry about my seam allowance.  Since I could see where it had already been sewn together, I just had to make sure I stayed beside that line.  Then when sewing the pieces together it was like I already had a guide in place.
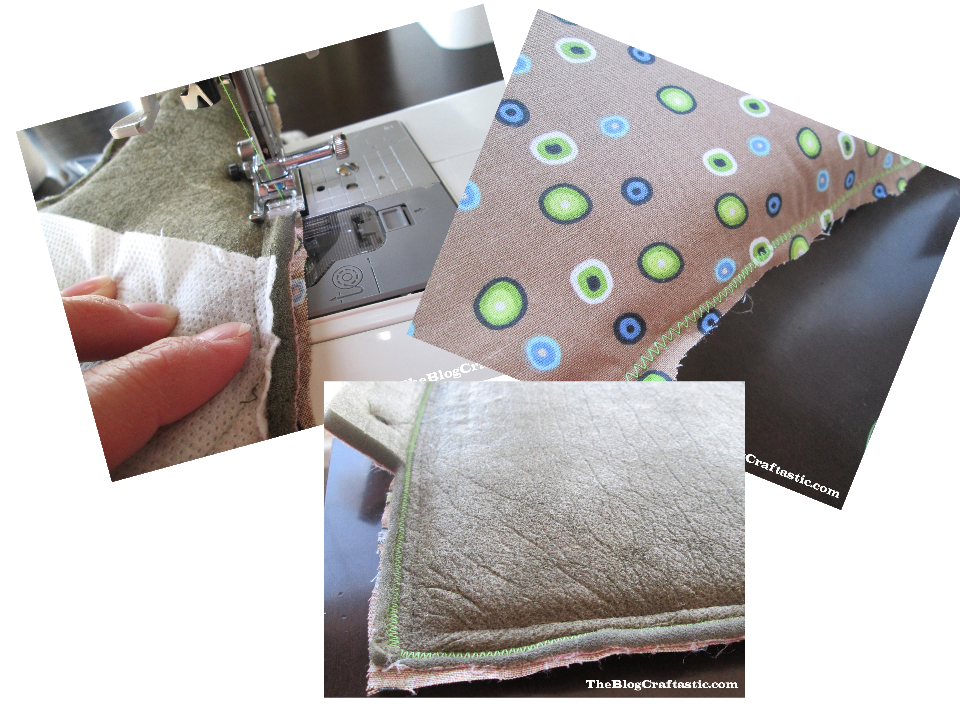

This part was a little tricky.  I originally thought I would have to sew buttonholes into the new fabric, but that's not what I ended up doing.  I realized it was much simpler to just sew a really tight zigzag stitch around the holes, then just cut the slit open.  Now, if you are an accomplished seamstress, or even an intermediate level, please be kind as you see the next few pics.  I realize they are not the neatest thing ever.  I will blame part of it on the fact that with the seat cover being so bulky it was very hard to see what I was doing and hard to make nice and neat stitching lines.  That said, I blame the rest of it on the fact that even after having my own sewing machine for a few years, I am still very much a beginner sewer!  So here we go:
I sewed it on my machine with the right side down, so that I could see where the hole was to sew around it.


Then folded it in half so that I could use my scissors to snip a hole.


Then I unfolded it and cut up to the stitching on both sides.


These tiny holes were really tricky to get neat....as you can tell.  This was the neatest one I did, if that tells ya anything.


Now I had all the fabric sewn on and all the holes made.  I was down to the last step of sewing it all back together and so excited to see the final result!


A little too excited, possibly.  This was not the easiest sewing I've ever done, due to the bulkiness of the cover.  I held it together as best I could, and sometimes it seemed like I was just shoving it under the needle.  My machine did something here and it scared the shnickles out of me.  In about .2 seconds I envisioned my hand being mangled under the needle and I jumped about a foot, jerking my hand back, and catching it on a pin.


After I calmed down I sewed all the sides together, then worked in the reverse order of how I took it apart.  


Oh, and remember how I said I got all the holes sewn and cut?  Yeah, not so much.  When I finished the cover I excitedly got the seat out and started putting the cover on, only to realize there were no holes for the belt to come up through.  Back to the machine.  Did the two last holes and THEN it was finished!


My intent in doing this was so that my little boy didn't have to ride around in a pink butterfly car seat (even though at 1-2 years old he could really care less).  When I finished it and asked my 4 year old if she liked it she said, "It looks like a girl seat".  Ah, oh well.  Better than the dirty butterflies, anyway.  

It turned out to be a lot harder than I thought as far as trying to sew something so bulky, and yet it was really quite simple.  So that's it!  Looks like a brand new seat!


22 February 2014

Snow Ice Cream!


When I was young, making snow ice cream was one of the many highlights of the winter season.  I would make a single serving every single night and eat it straight from the mixing bowl.  

Since most of the country has been getting hit with inches and feet of the fluffy white stuff, there have been various pictures and videos popping up all over the internet of people taking full advantage of their mandatory snow days!

This winter was our kids' first taste of snow ice cream.  And I think it was a hit!

This recipe is so easy:

1. Snow
2. Vanilla
3. Sweetened Condensed Milk

Oh and a side note, you don't need this much snow.  We got a little over zealous!  :)


Measure out about 8 cups of snow.


Pour in 1 can of sweetened condensed milk.


Add 1 tsp of vanilla.


And stir!
I'm not sure what he caught sight of here, but he did a pretty good job stirring it up!


I think it was a winner!


30 October 2013

Crafting with Kids: Spooky Spider Doorway


I love the changing of seasons.  Any excuse to do something creative that screams HEY!  IT'S (insert holiday/season here)!!!!!!!!  

On a side note, I was in the dollar tree the other day, looking for some supplies for this project, when I saw some very colorful, leafy oven mitts.  The kind that would scream, "IT'S FALL!" every time you pulled a piping hot treat out of the oven.  I loved them.  I decided my current, mis-matched and very drab, very used oven mitts needed to go, and these beautiful "fall-y" ones had to stay.  But then, if I throw my old ones away, I won't have any to use when fall time is over, and going back to the old drab ones after using these beauties was out of the question.  So that's when I decided I needed to buy 4 oven mitts.  Two for fall, and two for, well, non-fall.  That's when the hubby found me.  And that's when the "we don't need more stuff" versus "I will throw the old ones out and I like to have seasonal things to change out and these fall ones are SO cool" conversation ensued.  The "we don't need more stuff", albeit, voice of reason, won out.  To my shame, not without a little stalking off to the cash register.  I'm telling you, these were awesome mitts.  All that to say:

I love the changing of seasons.

Which brings me to our current season: Halloween!  After putting together the Great Pumpkin Patch craft, it dawned on me that what we did with the pumpkins could also be done to make these furry little creatures.

Here's how we did it!


What you need:
1. Styrofoam block (or something similar)
2. small styro balls, various sizes (I found these at Dollar Tree)
3. Larger styro balls (WalMart)
4. 2 packs of black pipe cleaners
5. hot glue gun/glue
6. black craft paint/paint brush
7. toothpicks
8. googly eyes
9. one bag of spider web
10. An eager, Rapunzel-clad helper :)


First thing we did was stick the little styro balls on toothpicks so they were easier to hold while painting.  Each spider consists of two different size balls.  A bigger ball for the body and a smaller ball for the head.  


Daisy did pretty good painting up to ball #4, then she decided she was done.  Apparently Rapunzel cannot be bothered with painting styrofoam balls black. 


Once the balls have dried, it's time to attach the smaller balls to the bigger ones.  By just using the toothpick already inserted, I stuck it into the bigger ball.


Put a few dabs of hot glue around the toothpick, then slide it the rest of the way on.


Repeat this process with the big styro balls.  For these I used two toothpicks to give it some extra support.


I got a little too much glue on this one, but it ended up okay.


Next we did the eyes.  This was fun because it started giving the little critters some personality.  I again used hot glue for the eyes.  I am sure there is another type of glue you could use if you want your kids to be able to help more.  I'm just a little in love with my hot glue.  


Done with the eyes!  In Daisy's words, "Goodness gracious, Mommy, they are so cute!"


Pipe cleaners make perfect critter legs!  Just stick the one end into the body, four on each side, bend down about halfway down, and then bend the very tip of it at the bottom like a foot.  And that's it!  

I was a little late to the Dollar Tree party and they were all out of spider webs.  But I found this one at WalMart and it's awesome!  I have never used one before.  One web could probably reach down the whole side of my house if I wanted it to.  Well, maybe halfway.  I tend to exaggerate when I get excited.  And nothing screams excitement like a fake spider web.

Anyway, I didn't really have a plan when I started putting the web up, and since I have never put one up before I was totally just figuring it out as I went along.  It's basically a big long rope, and then once you anchor it to the wall you then pull the sides apart.  Since I didn't have a plan I ended up having to go back and re-do some areas.  I started it on our bush and then just worked it around.  I just put nails into the siding wherever I wanted to anchor it.

We have had a pretty rainy and windy couple of days here.  Just wind and a constant drizzle....of course....and the web has held up surprisingly well in the weather.  Yesterday it didn't show hardly any wear at all.  Today it's starting to hang a little.  I'm just hoping it holds out till after Halloween night tomorrow!  


Attaching the big spider was a little tricky since she was too big to just tangle her legs into the web.  To get her to hang the way I wanted I had to anchor it in three different places.  In those spots I just put nails in, then I took white sewing thread and knotted them to the nails.  Next I pushed a nail halfway into the spider, wound the thread around the nail and then pushed it all the way in.


The baby spiders were a lot easier to attach.  Since they weren't nearly as heavy I could just wrap little pieces of the web around the feet and then they would just hang there like they were just sitting on the web!  


And there you have it!  A perfectly spooky, scary, and adorable doorway for Halloween!


We are ready!


08 October 2013

Crafting with Kids: The Great Pumpkin


Our family loves Charlie Brown.  While in the dollar store the other day I stumbled on these cool little styrofoam balls and was struck with some inspiration!  I went home and ordered It's the Great Pumpkin, Charlie Brown online.  Then I kicked myself when I saw it in WalMart for cheaper a couple days later.  Oh well, we're talking cents cheaper but it still hurt me.

My girl and I had a lot of fun making this after reading the book, and it was CHEAP!  I already had the sticks, grass, and pipe cleaners so I just spent 2 bucks on the styro things.

Here's what you need:


 1. 1 styrofoam block
2. 1 bag styrofoam balls
3. jumbo craft sticks (the little ones would work too)
4. green pipe cleaner
5. orange craft paint
6. paint brush
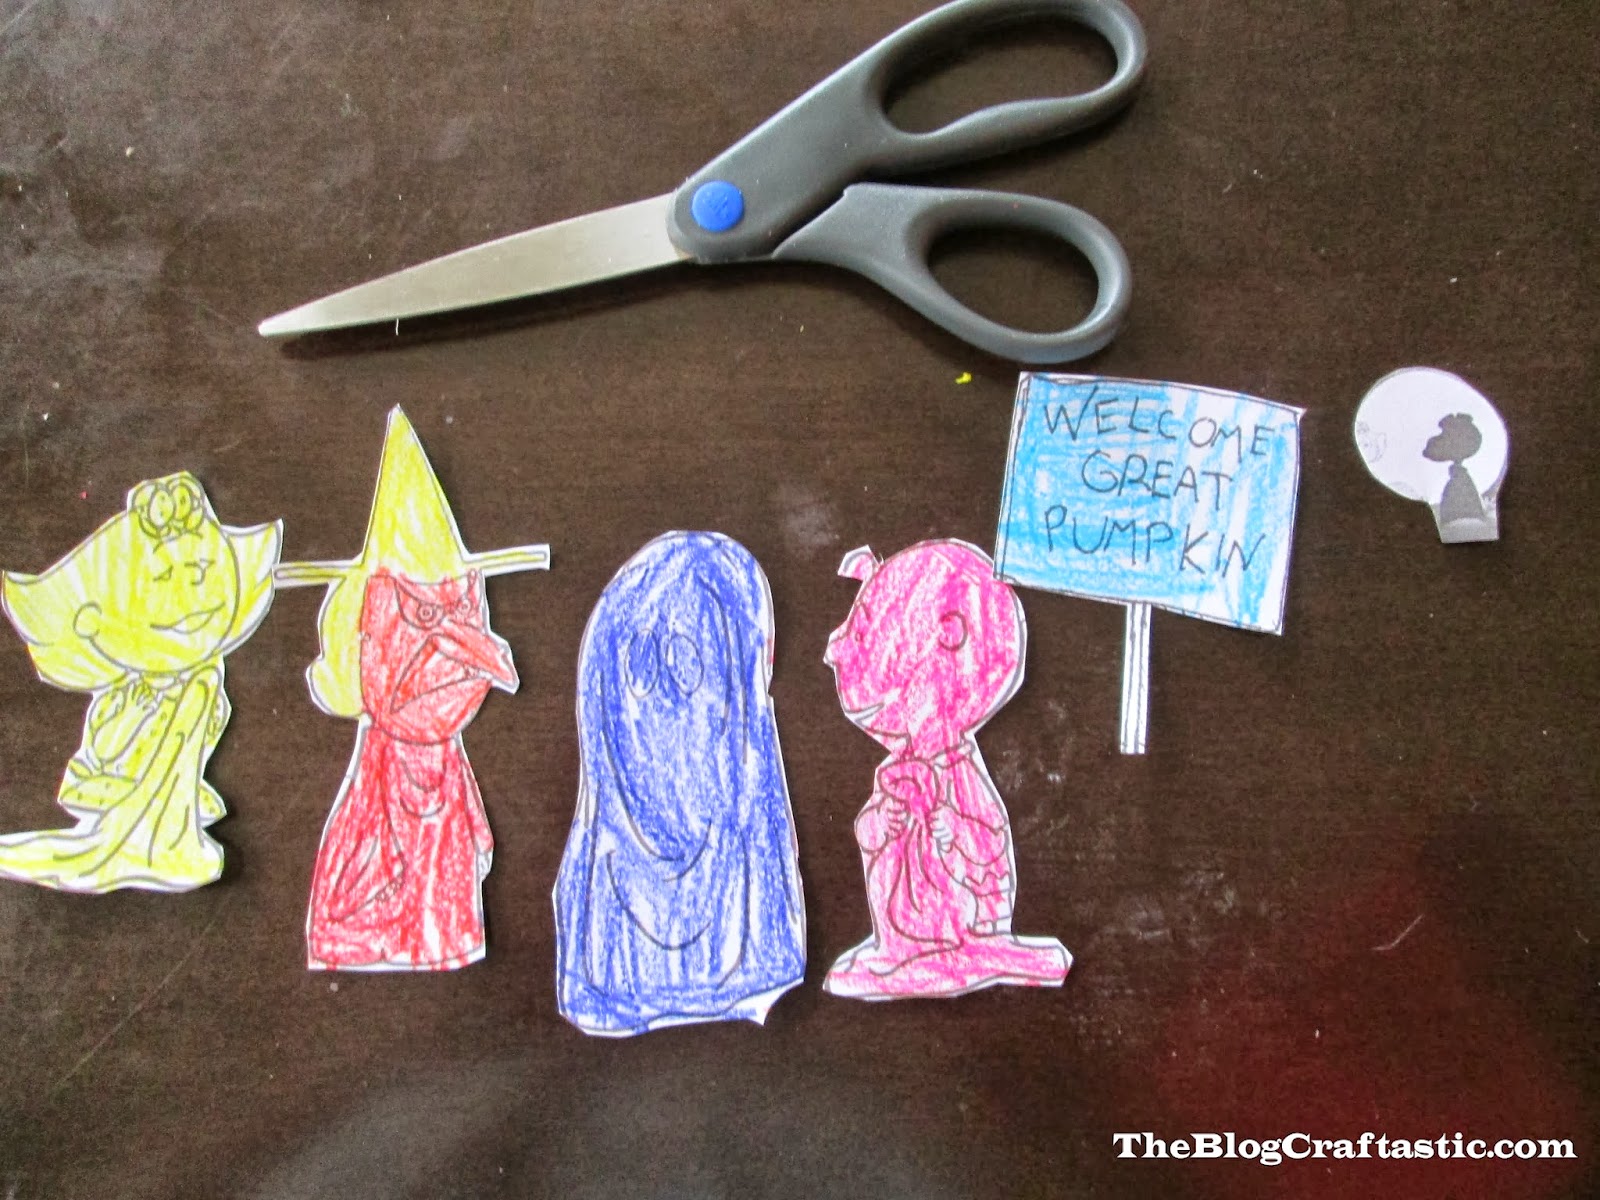
7. It's the Great Pumpkin characters coloring pages
8. (not pictured) toothpicks
9. (not pictured) coloring pages of the "welcome great pumpkin" sign and the snoopy/moon silhouette.


First I had Daisy color the characters while I got the styro balls ready to paint.


Then we cut out the colored characters.  I actually ended up going back to Google and looking for a Snoopy silhouette that was bigger.  I'm glad I did because the end result is better, I think.


Then we glued the characters to the jumbo craft sticks.  You could use the skinnier sticks too.  The big ones were just what I already had.


I think painting our styrofoam balls for the pumpkins was the most fun.  


We stuck the balls onto toothpicks to make them easier to paint.


Yup, that's my boy, painting his hand.  He takes a little prodding to stay on task. 


If you happen to have a block of styrofoam lying around, you can use that to stick the balls on to dry.  I happen to make a lot of cake pops, so I did have this.  I just flipped it over and used the underside.


If you don't have styrofoam, an empty egg carton would do the trick too.  Or an upside down paper cup.


Once we were done with the characters and the pumpkins, I started looking at the green styrofoam block I had picked up for our scene.  I realized I was going to want it a little bigger than it was.  Since it was pretty thick, I simply just cut it in half with a serrated knife.


I told Daisy she couldn't help me with this part, because hot glue is very hot and should only be used by adults.  And then I burned myself.


I glued the two pieces together, making a larger surface area for our little pumpkin patch scene.


I tried using Elmer's glue first to glue down the grass, but it didn't work.  It just wouldn't stick, even after holding it in place for a while.  So, back to the hot glue.  


There wasn't really any rhyme or reason to how I put it on there, just stuck it all over.  Now the fun part, putting it all together! 


 Daisy decided where everything should go.  And I can't believe I forgot to take pictures of the pumpkins.  Keep them on the toothpicks since you will use that to stick them down into the grass.  Some toothpicks may be too long and you will have to cut them.  Then take a green pipe cleaner and poke one end down into the top of each pumpkin, and cut it off.


And there you go!  A great, easy little craft to do with your kids!